
Released on July 27, 2026
Quick Guide: Setting Up a Surveillance Camera with SubViewports in Godot 4
Learn how to create an immersive, working security camera feed in Godot 4 using SubViewports, fix the dreaded pink/black texture bug, and apply a gritty CRT shader.
Table of Contents#
- Introduction: The Security Feed Illusion
- Step 1: The SubViewport Foundation
- Step 2: Rendering to the Monitor
- Fixing the Pink/Black Texture Bug
- Step 3: Realistic Mechanical Rotation
- Conclusion: Eyes Everywhere
Introduction: The Security Feed Illusion #
For a modern third-person shooter, interacting with the environment is key to immersion. One of the best ways to achieve this is by broadcasting a live security camera feed directly onto an in-game monitor.
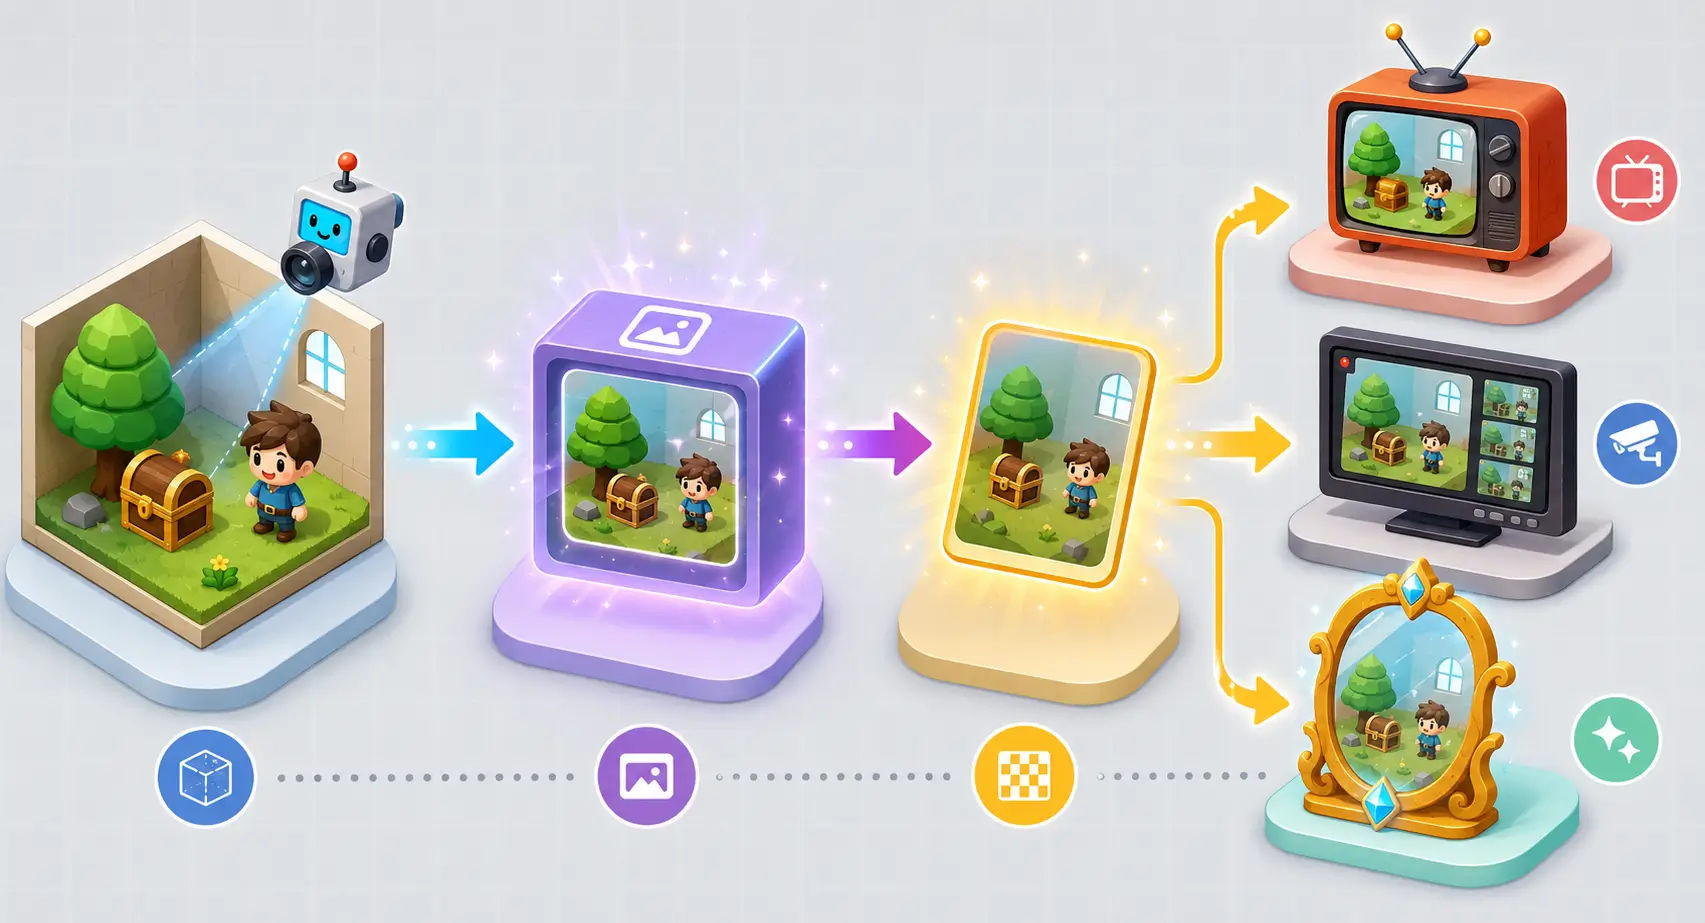
Instead of switching the player's entire screen to a different camera, we can use Godot 4's SubViewport system to render a secondary camera's perspective onto a physical 3D mesh in our level.
Step 1: The SubViewport Foundation #
A SubViewport acts as an isolated, secondary screen hidden inside your game world. Whatever is inside it gets rendered to a texture rather than directly to the player's screen.
Set up your node hierarchy like this:
RootNode (Your Level)
├── Player (with standard TPS Camera)
├── Level Geometry
└── SecuritySystem (Node3D)
    └── SubViewport
        └── SecurityCamera3D
Select the SubViewport and configure the following in the Inspector:
- Size: Set this to your desired resolution (e.g.,
512 x 512). Lower resolutions often look better for gritty, low-fi security cameras.
- Update Mode: Set this to
Always.
Select the SecurityCamera3D, place it in the corner of your room, and ensure its Current property is OFF so it doesn't hijack your player's camera.
Step 2: Rendering to the Monitor #
Now you need a screen in your level to display the feed.
- Add a
MeshInstance3D(a simple Quad or Box) to represent your monitor. - Create a new
StandardMaterial3Dfor it. - Set the material's Shading Mode to
Unshadedso it glows in the dark like a real screen. - In the editor, you can go to Albedo > Texture, choose New ViewportTexture, and assign your
SubViewport.
However, doing this in the editor often leads to a known engine quirk when you actually run the game...
Fixing the Pink/Black Texture Bug #
If you assign a ViewportTexture through the editor Inspector, you might notice your screen turns into a broken pink and black checkerboard when you hit play. This happens because the material loses the internal node path reference to the SubViewport at runtime.
Important: The Local to Scene Fix If you absolutely want to keep doing it through the Inspector without code, you need to ensure the Local to Scene flag is checked in two separate places, especially if your security camera is saved as its own
.tscnfile:
- Go to the Material on your mesh -> open the Resource section at the very bottom -> check Local to Scene.
- Go to the Albedo section -> click your ViewportTexture to expand its properties -> check Local to Scene here as well.
Step 3: Realistic Mechanical Rotation (The Final Touch) #
A real security camera doesn't float back and forth in a smooth, continuous loop like a pendulum. It runs on a mechanical stepper motor—it pans at a fixed speed to a specific angle, pauses to survey the area, and then pans back.
Instead of using a simple sine wave, we can use Godot's move_toward function combined with a simple timer to create this robotic "scan and dwell" behavior.
Attach this GDScript to your SecurityCamera3D:
extends Camera3D

@export var sweep_angle: float = 45.0
@export var rotation_speed: float = 15.0 # Degrees per second
@export var pause_duration: float = 2.0 # Seconds to pause at each edge

var start_y: float
var target_y: float
var pause_timer: float = 0.0
var moving_right: bool = true

func _ready() -> void:
    # Store the initial rotation so we sweep perfectly around the center
    start_y = rotation_degrees.y
    target_y = start_y + sweep_angle

func _process(delta: float) -> void:
    # 1. Dwell: If the camera is pausing, count down and wait
    if pause_timer > 0.0:
        pause_timer -= delta
        return

    # 2. Pan: Mechanically rotate towards the target angle at a constant speed
    rotation_degrees.y = move_toward(rotation_degrees.y, target_y, rotation_speed * delta)

    # 3. Switch: Check if the camera has reached its target edge
    if abs(rotation_degrees.y - target_y) < 0.1:
        # Start the dwell timer
        pause_timer = pause_duration

        # Calculate the next target for the opposite direction
        moving_right = !moving_right
        target_y = start_y + (sweep_angle if moving_right else -sweep_angle)
By exposing variables like rotation_speed and pause_duration using @export, you can easily create different camera archetypes in your editor—like a fast-scanning camera for high-security zones, or a slow, sweeping camera for abandoned hallways.
Conclusion: Eyes Everywhere #
By routing a Camera3D through a SubViewport and fixing the runtime texture references via script, you can easily create reliable, dynamic in-game screens. Pair it with a custom canvas shader, and you instantly add an extra layer of atmospheric polish to your project.
Continue Reading
Mastering the SpringArm3D in Godot: Never Clip Through Walls Again
Tired of your third-person camera clipping through walls and ruining game immersion? Discover how to use Godot’s SpringArm3D node to build a flawless, collision-aware camera system.
Godot 4 Anime Shader: The Definitive Cel Shading & Outline Guide
TAchieve the perfect professional anime look. This step-by-step masterclass covers custom cel shading and high-quality outlines in Godot 4 using the Visual Shader editor.